Windows Audio has stopped, which is why you see a red cross on the volume mixer. Services in Windows are responsible for making your PC work in different ways. In this case, you won’t have any audio on your system if the Windows Audio service isn’t running. Here’s how to fix Windows Could Not Start the Windows Audio Service on Local Computer.
Fix Windows 10/11 Could Not Start the Windows Audio Service on Local Computer
This error is often caused by the use of third-party antivirus on the system that causes this error.
1 Fix Windows 10/11 Could Not Start the Windows Audio Service on Local Computer1.1 Perform a Sound Troubleshooter1.2 Change Log On Settings1.3 Run SFC and DISM1.4 Change Audio Registry Permissions1.5 Final Words
In most cases, the antivirus program identifies the file as a virus and places it in quarantine. This results in the associated services becoming infected as well. To resolve this issue, follow the methods below.
Perform a Sound Troubleshooter
You can fix this issue by running the built-in troubleshooter. Here’s how.
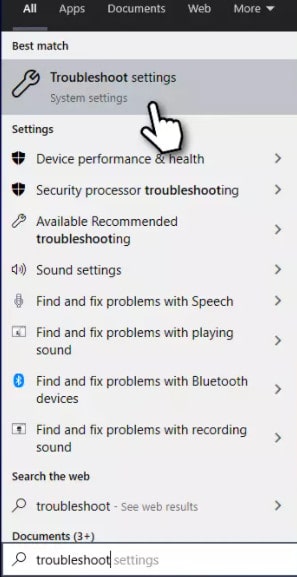
Search for troubleshooting in Windows search.
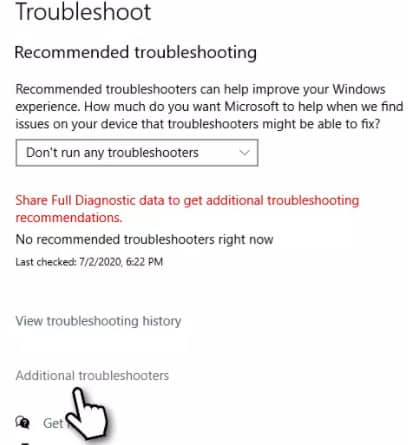
Choose Additional Troubleshooters options.
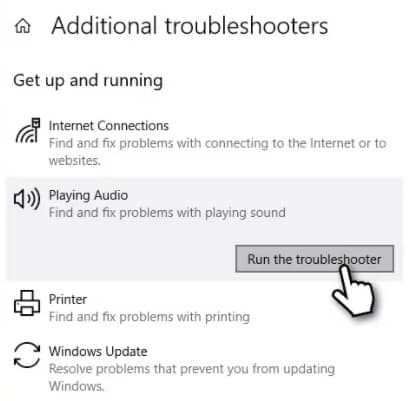
Choose Playing Audio. Select Run troubleshooter. Wait for the scan to complete.
Once you’ve done that, restart your computer after applying the fixes.
Change Log On Settings
It is possible to fix the error message by changing the log-on settings of the service. In these settings, the service is configured to log on as the specified user account. These settings represent how the service runs on your system. By configuring the local system account to log on as the service, you should be able to resolve the issue. Here are the steps you need to take:
Press the Windows key + R combination to open the Run dialog box.
Type services.msc in the Run dialog box after it has opened. Press Enter. A window called Services will appear.
The Services window will display a list of the services installed on your system. From here, you must select Windows Audio. You can do this by pressing the W key. Find Windows Audio and click on it.
Upon locating the Windows Audio service, right-click the service and choose Properties from the drop-down menu or double-click it to open its Properties window.
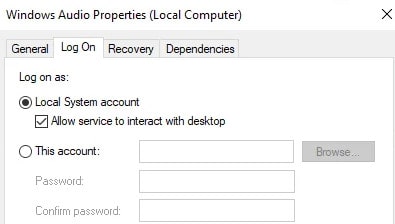
Select the Log On tab from the Properties window. It is automatically set to This account.
Select the option for the Local System account. Don’t forget to check the Allow service interaction with the desktop box option as well.
Hit OK after clicking the Apply button.
Afterward, open the Windows Audio service’s Properties window again. Start the service by clicking the Start button. That’s it.
Run SFC and DISM
You might encounter the Windows Audio Service that could not be started on local computer error when your system files are corrupted. You can resolve this issue by running SFC and DISM. Here’s how.
- Type cmd in the Windows search box.
- Select Run as administrator by right-clicking on Command Prompt.
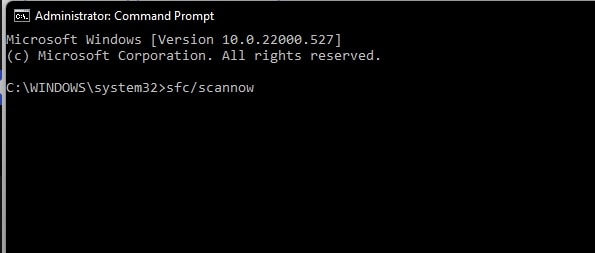
3. Enter sfc /scannow and hit Enter. Let the scan complete.
4. If any integrity violations are found, Windows will report them as soon as the scan is completed. The following commands should be pasted if SFC cannot repair found errors. Press Enter after each command.
Change Audio Registry Permissions
The audio registry could be inaccessible due to improper permissions on your user account. If this occurs, you will need to give your user account full control of the audio registry. A change to the Windows Registry is generally not recommended due to the possibility of causing system problems. So, follow the procedure carefully to avoid any issues.
By pressing Windows key + R, you can open the Run dialog box.
Enter regedit in the Run dialog box. Press Enter. Click Yes to accept the User Access Control screen.
The Windows Registry window will appear. Now, go to HKEY_LOCAL_MACHINE\SOFTWARE\Microsoft\Windows\CurrentVersion\MMDevices. Copies it and pastes it in the Windows registry address bar.
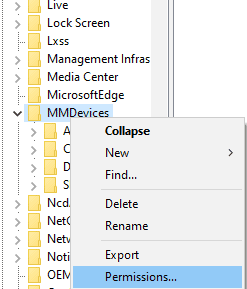
You will be taken to the MMDevices folder. Right-click on it. Then, select Permissions.
We must assign Full Control permissions to everyone in this case. First, we must add permission. Press the Add button.
Next, click the Advanced button. Next, click the Find Now button.
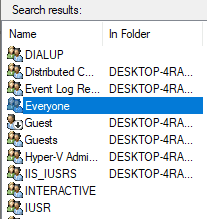
The system will display a list of all users and groups. Select Everyone from the list. Press OK.
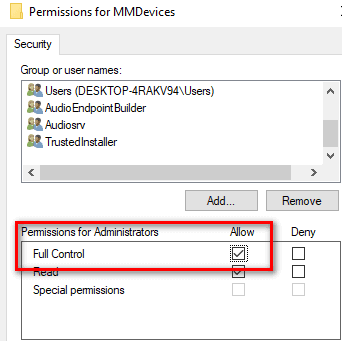
Choose Everyone under the Group or user names section of the Permissions window. Enable Full Control by checking the box under Allow.
Click on the Apply button when you are done. Then click OK.
Finally, close the Window containing the Windows Registry. Go to the Start Menu and find the Services menu item.
Relocate the Windows Audio service. Test it by starting it again.
Final Words
This is How to Fix Windows Could Not Start the Windows Audio Service on Local Computer error. Your issue will be solved by following the methods mentioned above. RELATED GUIDES:
Download and Install Realtek HD Audio ManagerHow To Record Audio On Windows 11How To Fix Update Error 0x8024a205 on Windows 11Fix Super People Audio Not Working on Windows 11/10 PC
Δ
